|
Example Two
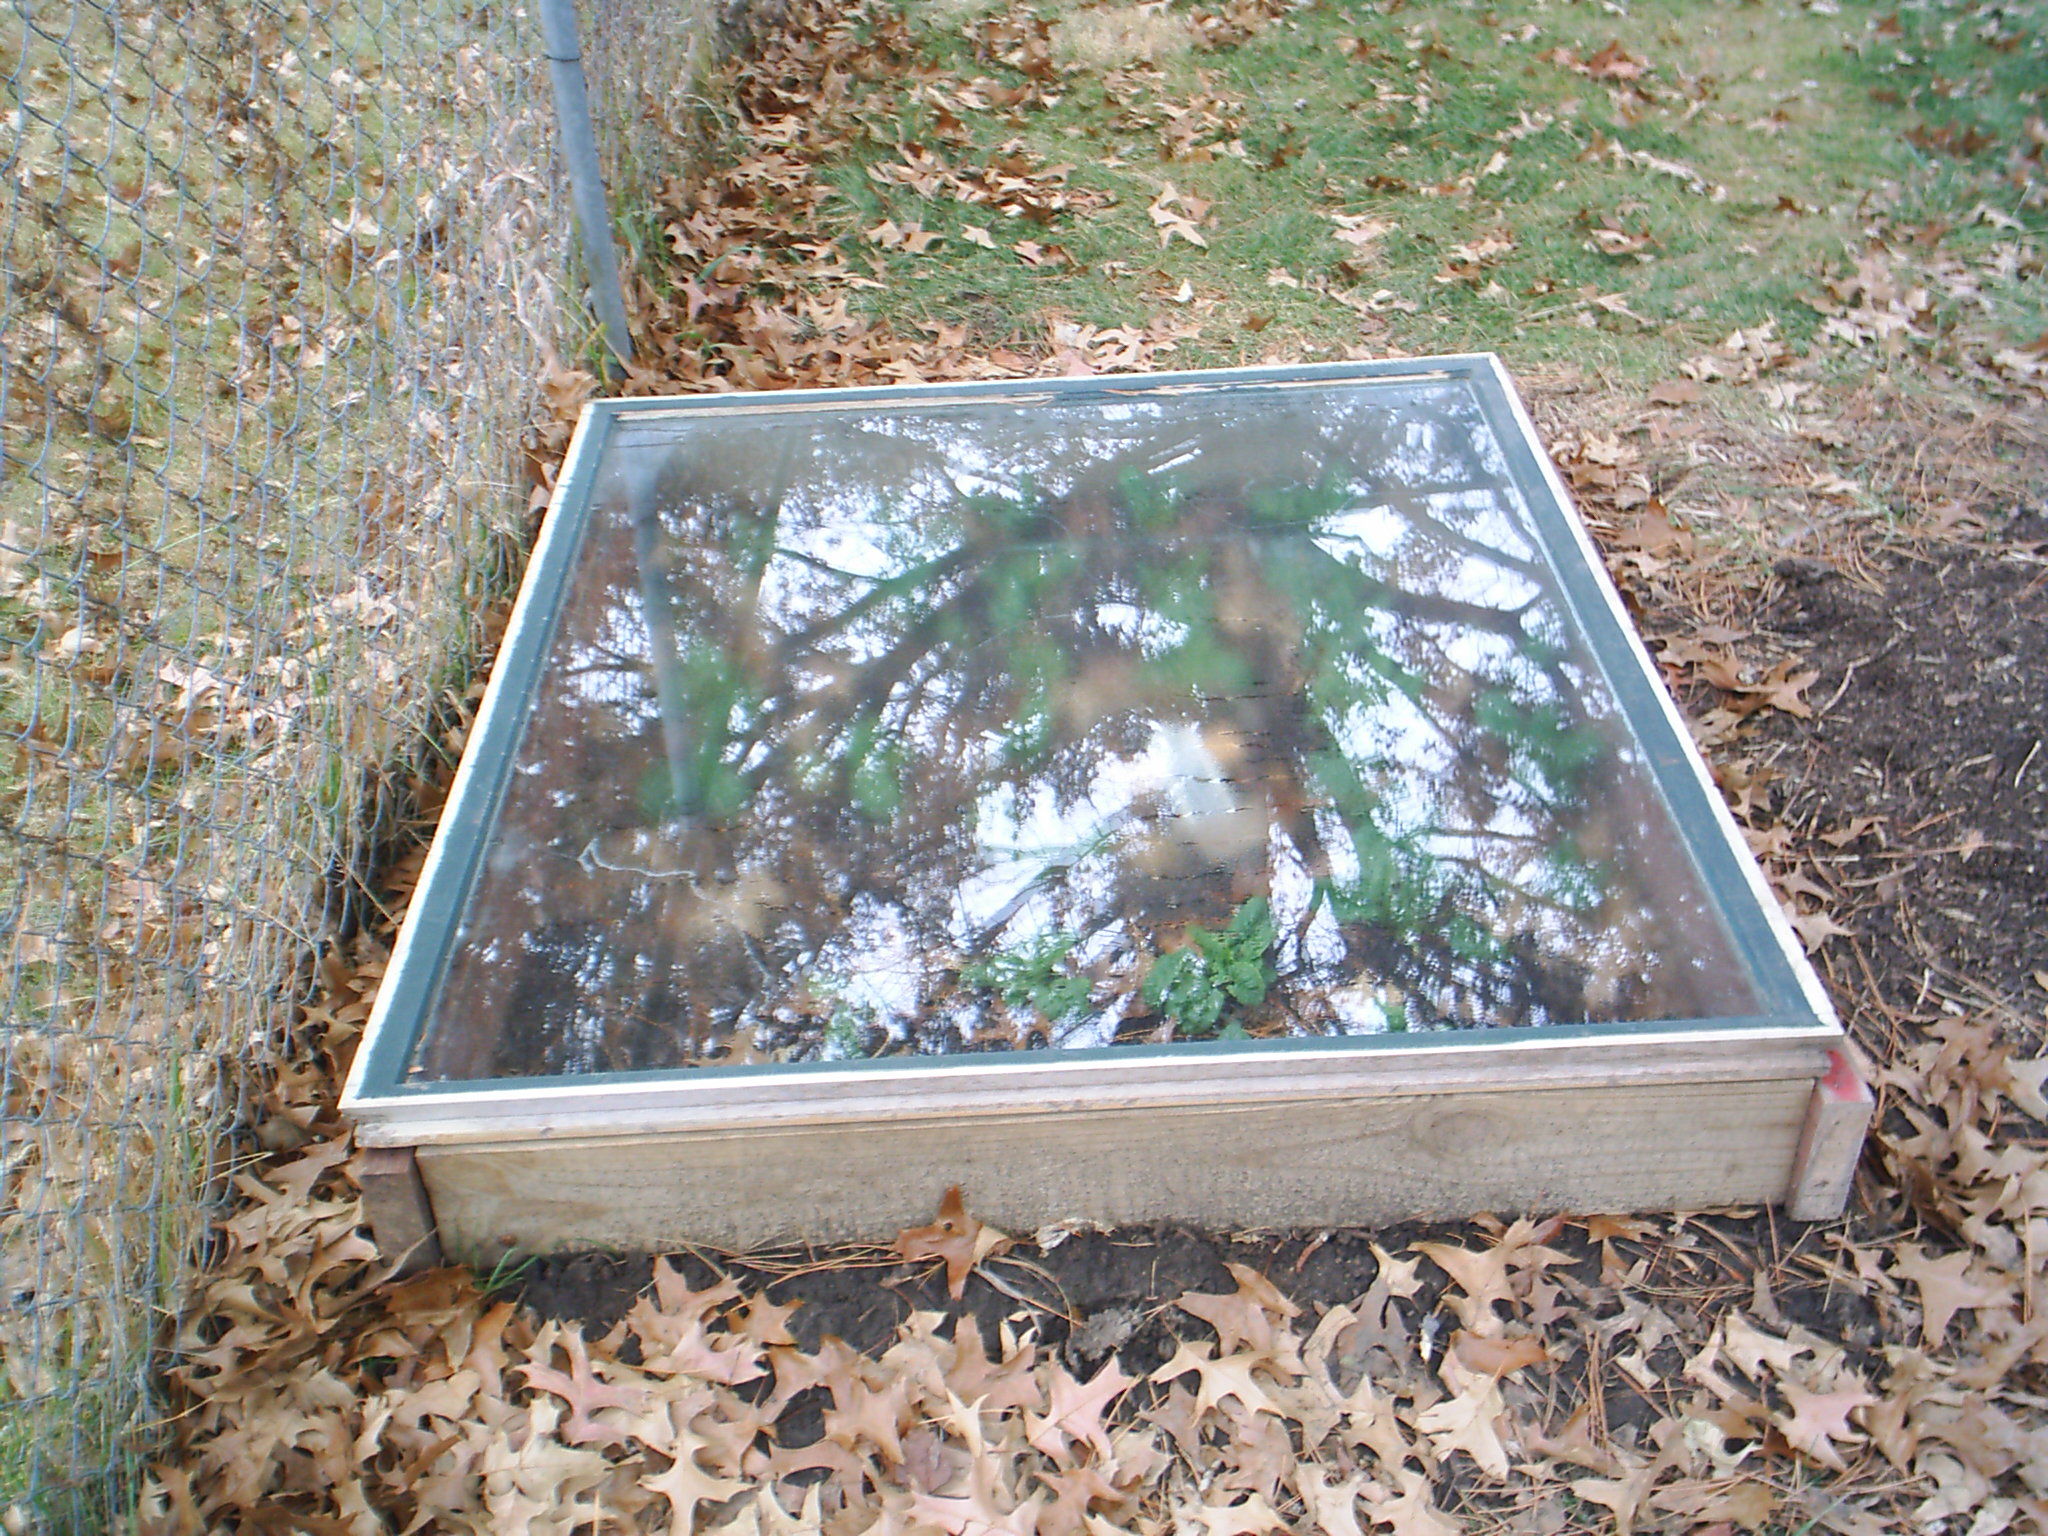
Materials:
- Four 2 X 6 boards (length depends upon the glass you use).
- One salvaged window.
- Eight 3-inch Phillips-head screws.
Procedure:
- Measure the window you wish to use.
- Assuming it is a rectangle, take the measurement of the shorter side, subtract 3 inches from this measurement, and cut two of the 2 X 6 boards this length.
- Next, take the measurement of the longer side, add 2 inches to it, and cut the remaining two boards this length.
- Drill two holes in the side of the long boards at either end. The holes should be 1 inch from each edge of the board and 1 1/2 inches from the end. Make the holes large enough so that the threads of your 3-inch Phillips-head screws can slide through them with some encouragement.
- Line up the ends of the shorter boards so that the screws coming through the holes will screw into the center of the end of the short boards.
When all eight screws are secure, you should have a rectangle. When you set it on the ground, your window should fit on top. If the ground is uneven, you may have to prop up a corner with some scrap lumber to create a level surface for the window to rest upon. Shovel dirt around the outside of the cold frame to close gaps on the ground to prevent cold air from infiltrating inside in winter.
You may place your cold frame wherever you wish, so you can enclose some very productive lettuce or spinach plants you'd like to carry on beyond the first killing frost. You may also plan for this cold frame by establishing a planting (like spinach) and then enclosing it with this cold frame as winter approaches and the plants need protection.
Back to Cold Frames
Back to home page
|